
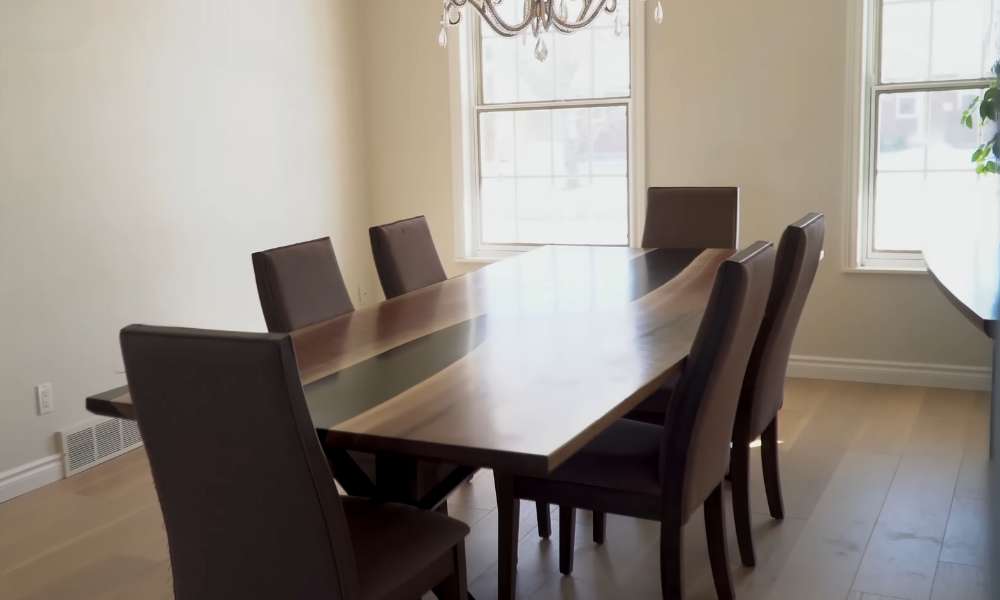
A well-crafted dining room table serves as the heart of your home, providing a central place for family gatherings, celebrations, and daily meals. Creating your dining room table not only allows you to customize it to your specific style and needs but also gives you the satisfaction of building something with your own hands. This guide will walk you through the entire process, from selecting the right materials to the final finishing touches, ensuring you end up with a beautiful and functional piece of furniture. Whether you’re a seasoned DIY enthusiast or a beginner, this step-by-step guide will help you create a dining room table that you can be proud of for years to come.
1. Materials Needed
The primary materials include high-quality wood, such as oak, pine, or maple, depending on your preference for durability and appearance. Additionally, you’ll need wood screws, wood glue, and sandpaper for assembly and finishing. For the tabletop, consider using thick, sturdy planks to ensure stability and longevity. As for tools, a saw for cutting the wood to size, a drill for creating screw holes, clamps for holding pieces together while the glue dries, and a sander for smoothing the surfaces are indispensable. A measuring tape, carpenter’s square, and safety gear, such as goggles and gloves, are also crucial for precision and safety.
2. Choosing the Right Wood
Selecting the right wood is crucial for crafting a durable and attractive dining room table. Popular choices include oak, maple, and cherry, each offering unique benefits. Oak is known for its strength and pronounced grain, making it a favorite for rustic or traditional designs. Maple, with its smooth texture and lighter color, is ideal for contemporary or minimalist styles. Cherry, although more expensive, provides a rich, warm hue that darkens beautifully over time. When choosing wood, consider factors such as durability, aesthetics, and cost. Durability ensures the table withstands daily use, while aesthetics influence the overall look and feel of your dining space. Balancing these factors within your budget will help you select the perfect wood for a long-lasting and visually appealing dining room table.
3. Design and Measurements
Creating a design blueprint is the first step in building your dining room table. Start by sketching your table design, detailing dimensions and features like the tabletop size, leg style, and overall height. This blueprint serves as a guide, ensuring precision and consistency throughout the building process. Next, measure each piece of wood accurately using a measuring tape and carpenter’s square to guarantee straight cuts and proper alignment. Mark your measurements clearly with a pencil before cutting. Use a saw to cut the wood to the specified dimensions, ensuring each piece matches the blueprint. Accurate measurements and precise cuts are essential for a well-balanced, sturdy table. By following a detailed blueprint and taking careful measurements, you’ll lay a solid foundation for your dining area table project.
4. Building the Tabletop
Assembling the tabletop involves a few key steps to ensure a strong, smooth surface. Start by laying out your wooden planks side by side, arranging them to highlight the best grain patterns. Apply wood glue along the edges of each plank, then press them together tightly. Use clamps to hold the planks in place as the glue dries, ensuring a firm bond. Once the glue has set, remove the clamps and check for any gaps or uneven areas. Sand the surface thoroughly using coarse-grit sandpaper to level the joints, then switch to finer grits for a smooth finish. For a seamless look, pay extra attention to the edges and corners, rounding them slightly if desired. Following these steps will help you achieve a durable, visually appealing tabletop for your dining area table.
5. Constructing the Table Legs
Constructing the table legs involves choosing a style and ensuring they provide sturdy support. Popular styles include straight, tapered, and turned legs, each adding a distinct aesthetic to your table. To build straight or tapered legs, cut the wood to your desired length and shape using a saw. For turned legs, you might need a lathe to achieve the intricate design. After cutting, sand each leg to remove any rough edges. To attach the legs, mark the positions on the underside of the tabletop and pre-drill holes for the screws. Use wood glue at the joints for added strength, then screw the legs into place. Ensure the legs are evenly spaced and aligned to prevent wobbling. This detailed approach will result in stable and visually appealing table legs.
6. Joining the Pieces Together
Joining the pieces of your dining table requires techniques that ensure strong, durable joints. Mortise and tenon joints, dowel joints, and pocket hole screws are popular methods. Mortise and tenon joints offer exceptional strength and are ideal for connecting legs to the tabletop. Dowel joints provide a clean look and are useful for aligning pieces accurately. Pocket hole screws are simpler to use and great for beginners, offering solid support. To create these joints, you’ll need tools such as a drill, chisels, dowels, and a pocket hole jig. Apply wood glue to the joints before assembly to enhance durability. Clamp the pieces together while the glue dries to ensure a tight fit. Using these techniques and tools will result in a sturdy, long-lasting dining area table.
7. Sanding and Smoothing
Proper sanding techniques are crucial for achieving a flawless finish on your dining room table. Begin with coarse-grit sandpaper (60-80 grit) to remove rough spots and level uneven areas. Sand in the direction of the wood grain to avoid scratches. Gradually move to medium-grit sandpaper (120-150 grit) to smooth the surface further, then finish with fine-grit sandpaper (220 grit) for a silky finish. Use a sanding block or an orbital sander for consistent pressure and even results. Pay special attention to edges and corners, ensuring they are smooth and slightly rounded. After sanding, wipe the surface with a damp cloth to remove dust. Proper sanding not only enhances the table’s appearance but also prepares it for staining and finishing, ensuring a professional-quality result.
8. Staining and Finishing
Choosing the right stain and finish is essential for enhancing the beauty and durability of your dining area table. Select a stain that complements your decor and highlights the wood’s natural grain. Oil-based stains offer rich color and deep penetration, while water-based stains are easier to clean up and dry faster. Apply the stain with a clean cloth or brush, working in the direction of the grain. Read, Centerpieces for dining room table ideas. Wipe off excess stains to ensure an even color. Allow the stain to dry thoroughly before applying the finish. For a professional look, use a polyurethane finish for its durability and resistance to moisture. Apply the finish in thin, even coats, sanding lightly between each coat with fine-grit sandpaper. This process will give your table a smooth, polished surface that lasts.
9. Final Assembly
The final assembly of your dining room table involves bringing all components together to ensure stability and balance. Begin by positioning the tabletop upside down on a padded surface to avoid scratches. Attach the legs or trestles securely, using the pre-drilled holes and strong wood screws. If using brackets or additional support beams, install them to enhance stability. Carefully flip the table upright and check for any wobbling or unevenness. Adjust the legs or add shims if necessary to achieve perfect balance. Tighten all screws and joints one last time to ensure they are secure. Test the table by applying gentle pressure on various points to confirm its sturdiness. This careful attention to detail during final assembly will result in a robust, balanced dining area table ready for use.
10. Maintenance Tips
Proper care and maintenance will keep your dining table looking beautiful and lasting for years. Regularly dust the surface with a soft cloth to prevent scratches. Wipe up spills immediately with a damp cloth to avoid stains and water damage. Use coasters and placemats to protect the table from hot dishes, moisture, and scratches. Periodically, apply a furniture polish or wax to maintain the finish and enhance the wood’s luster. Inspect the table for any loose joints or screws, tightening them as needed to maintain stability. If scratches or dents occur, lightly sand the affected area reapply the stain, and finish to blend it in. By following these maintenance tips, you can prevent common issues and keep your dining table in top condition.
Conclusion
Building your dining area table is a rewarding project that combines creativity and craftsmanship. By carefully selecting the right materials, accurately measuring and cutting, and employing proper assembly techniques, you can create a beautiful and durable table that will be the centerpiece of your dining room. Remember to follow the detailed steps for sanding, staining, and finishing to achieve a professional look. Regular maintenance will ensure your table remains in excellent condition, providing a welcoming space for meals and gatherings for years to come. Embrace the process, and take pride in the unique, handcrafted table you’ve created, a testament to your skill and dedication.